Nail Tutorial : Minions
Well, I bet the Despicable Me Minion craze has already died off but I'm captivated by the cuteness of the lil minions on nails. So I came up with a really simple minion nail art design, which you can do by yourself no professionals needed.. This was my first time trying to recreate it. So I hope you guys enjoy! =) Oh ya do send me a picture, video response or blog post, I would love to see your guys recreations.
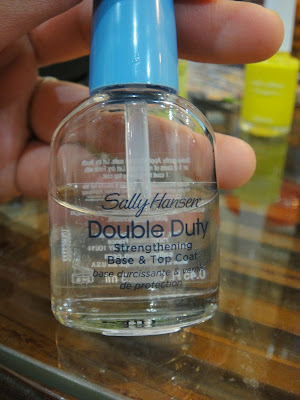
First off you would want to protect your nails with a base coat.
I'm using my Sally Hansen Double Duty Strengthening Base n Top Coat.
Then after the base coat has dried apply a banana yellow polish.
Mine is from Elianto nail color in S01. If your polish is sheer, apply a second coat after the first has dried. we want an opaque finish.


After the yellow polish has totally dried.
Find a jeans blue polish or any dark blue polish or u can use any color for the pants for ur minions
I got mine from SASA, it's called Arezia in Code 881.
Just a apply a horizontally at the bottom of ur cuticle beds. Minons go " bahahaha, bottom, bahaha bottom"
so you'll have a blue horizontal stripe.

after the pants has dried, on a piece of plastic/paper drip some black nail polish on top.
Mine is from Bloop in H118.
Using a dotting tool / the edge of a bobby pin to dot on two black blobs on the yellow polish as eyes.


After it has dried, take any white polish and drip in on the plastic / paper and using a dotting tool / a bobby pin to dot the white polish above the black blobs with a slightly lighter hand to so u created the goggles the the white for the minions.


Last step is eye balls smile and hair.
This step is easy. using just a toothpick black nail polish.
Dip the tooth pick in the black polish and dot on the eyes and hair n mouth.


After it has dried apply a top coat and Voila Minion Nails. =)

Hope you enjoy this nail tutorial. If you love to see more please do send me requests.
And remember to send me your recreations.
Love you
Contact me at
Twitter, Intagram, Vine
@EileenWrighton
Facebook
https://www.facebook.com/leen.epxm13
Email
rusticmonkey13@gmail.com
Youtube
EileenWrighton
First off you would want to protect your nails with a base coat.
I'm using my Sally Hansen Double Duty Strengthening Base n Top Coat.

Then after the base coat has dried apply a banana yellow polish.
Mine is from Elianto nail color in S01. If your polish is sheer, apply a second coat after the first has dried. we want an opaque finish.


After the yellow polish has totally dried.
Find a jeans blue polish or any dark blue polish or u can use any color for the pants for ur minions
I got mine from SASA, it's called Arezia in Code 881.
Just a apply a horizontally at the bottom of ur cuticle beds. Minons go " bahahaha, bottom, bahaha bottom"
so you'll have a blue horizontal stripe.

after the pants has dried, on a piece of plastic/paper drip some black nail polish on top.
Mine is from Bloop in H118.
Using a dotting tool / the edge of a bobby pin to dot on two black blobs on the yellow polish as eyes.


After it has dried, take any white polish and drip in on the plastic / paper and using a dotting tool / a bobby pin to dot the white polish above the black blobs with a slightly lighter hand to so u created the goggles the the white for the minions.


Last step is eye balls smile and hair.
This step is easy. using just a toothpick black nail polish.
Dip the tooth pick in the black polish and dot on the eyes and hair n mouth.


After it has dried apply a top coat and Voila Minion Nails. =)

Hope you enjoy this nail tutorial. If you love to see more please do send me requests.
And remember to send me your recreations.
Love you
Contact me at
Twitter, Intagram, Vine
@EileenWrighton
https://www.facebook.com/leen.epxm13
rusticmonkey13@gmail.com
Youtube
EileenWrighton

Comments
Post a Comment